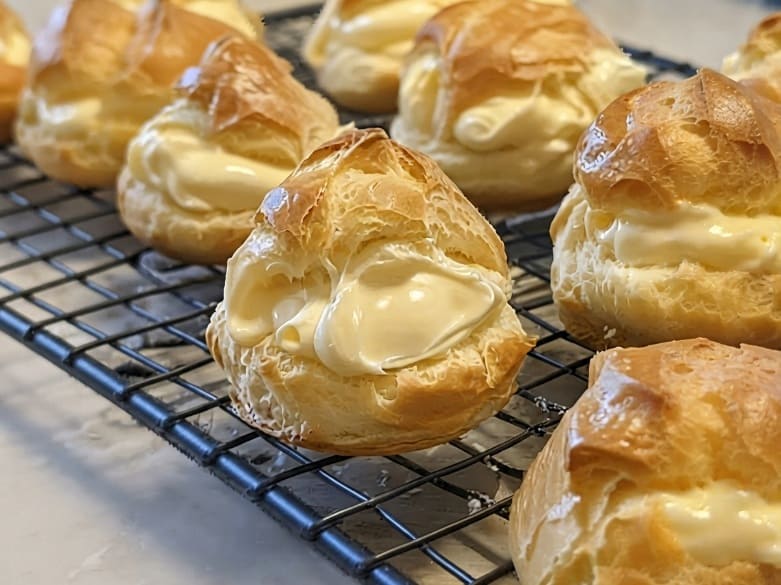
Okay so, let’s talk about Mom’s Famous Cream Puffs, because these things have a reputation for a reason. Every family gathering, every potluck, every holiday — someone’s asking “wait, are you making the cream puffs?” That’s how you know a recipe’s a keeper. What you get is this light, airy pastry shell stuffed with silky, sweet cream, and honestly, the first time you make it, it kind of feels like magic. Good news though — once you get the hang of it, it’s way less scary than it looks.
If you’ve ever tried making classic cream puffs and had them go flat and sad on you, don’t worry, I gotchu. Below is the whole rundown — the pastry, the filling, some tips I wish someone had told me sooner, plus a few fun twists to try.
Why Mom’s Cream Puffs Are Kind Of A Big Deal
Cream puffs look fancy, like “ooh, bakery-bought” fancy, but the base is actually pretty simple — it’s called choux pastry, and the trick is you cook it twice. Once on the stove, once in the oven. That’s literally the whole secret to getting that hollow, airy inside that’s just begging to be filled with cream. Mom’s version isn’t complicated, it just pays attention to a few little details — room temp eggs, not rushing the timing, and a filling that’s rich but not so sweet it makes your teeth hurt.
And unlike the store-bought stuff that cuts corners, these famous cream puffs are 100% from scratch, so you’re in full control of how light the pastry turns out and how creamy that filling is. Honestly, that homemade factor is everything here — it’s why people take one bite and go “wait, this tastes like my grandma’s.”
What You’ll Need for the Pastry
• 1 cup water
• 1/2 cup unsalted butter
• 1/4 teaspoon salt
• 1 tablespoon sugar
• 1 cup all-purpose flour
• 4 large eggs, room temperature
What You’ll Need for the Filling
• 2 cups heavy whipping cream
• 1/3 cup powdered sugar
• 1 teaspoon vanilla extract
• Optional: a box of instant vanilla pudding mix, if you want the filling extra thick and sturdy
• Powdered sugar or melted chocolate for topping, because why not
Simple list, right? That’s kind of the whole point — you don’t need anything weird to make great homemade cream puffs, just a little patience.
Let’s Make the Pastry
1. Preheat and get set up. Preheat your oven to 400°F and line a baking sheet with parchment paper.
2. Boil your base. Toss the water, butter, salt, and sugar into a saucepan and bring it to a rolling boil over medium heat. Make sure that butter’s fully melted before moving on.
3. Dump in the flour. Pull it off the heat and add the flour all at once, stirring like your life depends on it with a wooden spoon. Then pop it back on low heat and keep stirring for a minute or two until it forms a smooth ball that pulls away from the pan sides.
4. Let it cool a bit. Move the dough to a bowl and give it about 5 minutes to cool down. Don’t skip this — toss eggs into hot dough and you’ll basically end up with scrambled eggs mixed in. Not the vibe.
5. Mix in the eggs. Add the eggs one at a time, beating well after each one. The dough should end up smooth, glossy, and thick enough to hold its shape.
6. Pipe or scoop it out. Use a piping bag or just a spoon and portion the dough into little mounds, about 2 inches apart, on your baking sheet.
7. Bake it up. Bake for 20 minutes, then drop the oven down to 350°F and bake another 15-20 minutes until they’re golden and firm. And seriously, do NOT open that oven door early — sudden temperature changes will make your puffs collapse, and that’s just heartbreaking.
8. Let ’em cool all the way. Cool the puffs completely on a wire rack before you fill them. Pro tip — poke a little hole in the side of each one so steam can escape, keeps them nice and crisp.
Now, the Filling
1. Whip your cream. Beat the heavy whipping cream in a chilled bowl on medium-high until soft peaks form.
2. Add the sweet stuff. Mix in the powdered sugar and vanilla, then keep beating until you get stiff peaks. If you’re doing the pudding mix version for extra thickness, fold it in now.
3. Chill it if you need to. If your kitchen’s warm, stick the filling in the fridge for 10-15 minutes before you pipe it, it’ll hold its shape way better.
Putting It All Together
Once your shells are totally cooled and your filling’s ready, it’s assembly time.
• The classic way: Slice each puff in half, pipe or spoon in the filling, pop the top back on.
• The bakery way: Poke a small hole in the bottom and pipe the filling straight in, keeping the shell looking all clean and intact.
Finish it off with a dusting of powdered sugar, a drizzle of melted chocolate, or honestly both if you’re not feeling shy today. That little finishing touch is what makes these classic cream puffs look like you picked them up from a fancy bakery, even though you made them in your pajamas.
Tips I Wish I Knew Sooner
• Measure things properly. Choux pastry doesn’t forgive eyeballing it, so actually use your measuring cups this time.
• Don’t skip the drying step. Stirring the dough on low heat after the flour goes in helps get rid of extra moisture, which means a better rise.
• Room temp eggs, always. Cold eggs make the dough seize up a bit and it’s just harder to get that smooth, glossy texture.
• Leave the oven door alone. I know it’s tempting to peek, but a sudden temp drop is basically the #1 reason puffs fall flat.
• Fill right before serving. These are best eaten within a few hours of filling, since the shells can get a little soft after a while.
Fun Twists to Try
The classic version is great, but here’s some ways to mix it up if you’re feeling adventurous:
Chocolate Cream Puffs: Add cocoa powder into the dough, or just dunk the finished puffs in melted chocolate. Honestly, can’t go wrong here.
Coffee Filling: A shot of espresso or a bit of instant coffee in the cream filling gives you a nice little mocha situation.
Fruity Puffs: Fold in some fresh berries or fruit compote for something lighter and a little more summery.
Croquembouche Vibes: Stack a bunch of puffs into a tower and drizzle caramel over the whole thing. Instant showstopper, guaranteed compliments.
Mini Puffs: Pipe smaller mounds for cute little bite-sized versions — great for parties, showers, weddings, whatever..
How to Store These
• Unfilled shells: Keep in an airtight container at room temp for up to 2 days, or freeze for up to a month if you want to plan ahead.
• Filled puffs: Keep ’em in the fridge and eat within 24 hours for the best texture.
• Bringing shells back to life: If they’ve gone a little soft, a quick 5-minute reheat at 300°F crisps them right back up before filling.
Questions People Always Ask Me
Why did my cream puffs go flat? Probably opened the oven too soon, or they didn’t bake long enough to fully dry out and set inside. Patience, my friend.
Can I make the shells ahead of time? Yep, totally. Make them a day or two early, keep ’em at room temp, then fill right before you serve.
What’s actually different between cream puffs and eclairs? Same pastry, different shape — cream puffs are round, eclairs are that long shape and usually get iced on top.
Can I just use Cool Whip instead of making real whipped cream? You could, but real homemade whipped cream is what makes Mom’s cream puffs taste like Mom’s cream puffs. It’s a few extra minutes, and it’s worth it, promise.
Final Thoughts
Mom’s Famous Cream Puffs are honestly proof that you don’t need a ton of fancy ingredients to make something that wows people — you just need a little patience and maybe a wooden spoon you don’t mind stirring aggressively with. Crisp, golden pastry, rich creamy filling, and that unmistakable homemade taste — these classic cream puffs bring the bakery straight to your kitchen. Make a batch once and don’t be surprised if you’re suddenly “the cream puff person” at every family event from here on out.